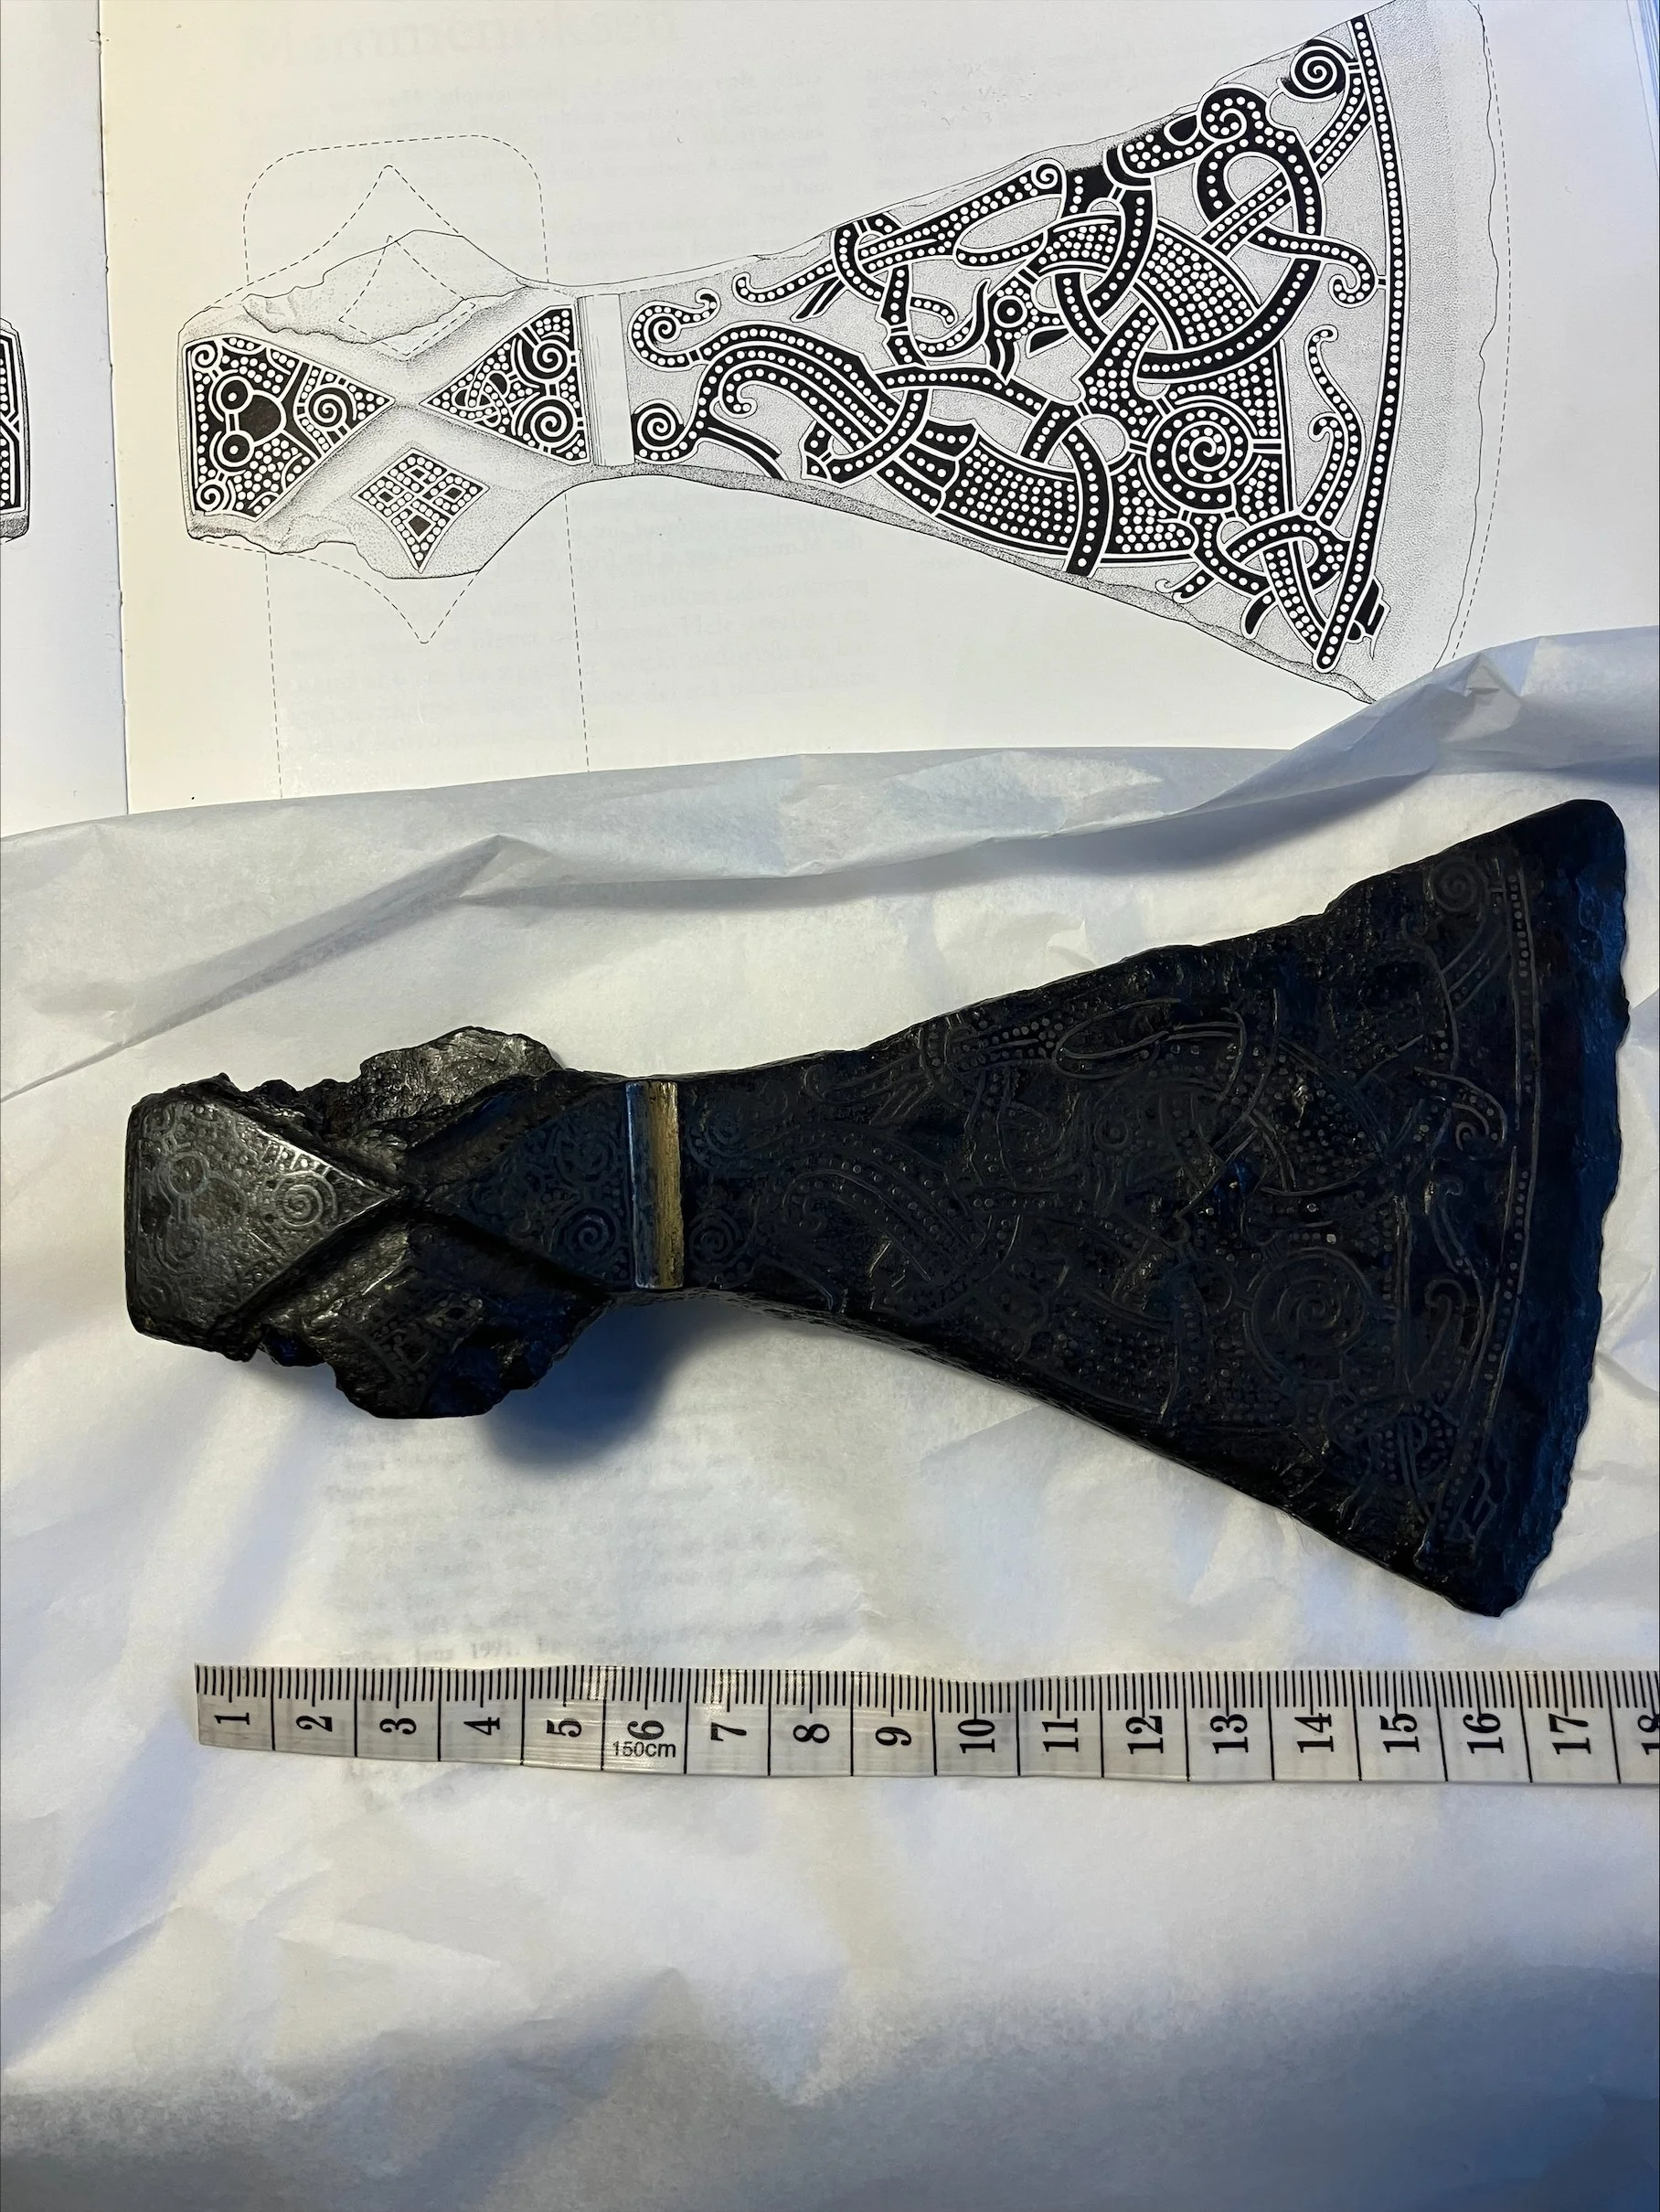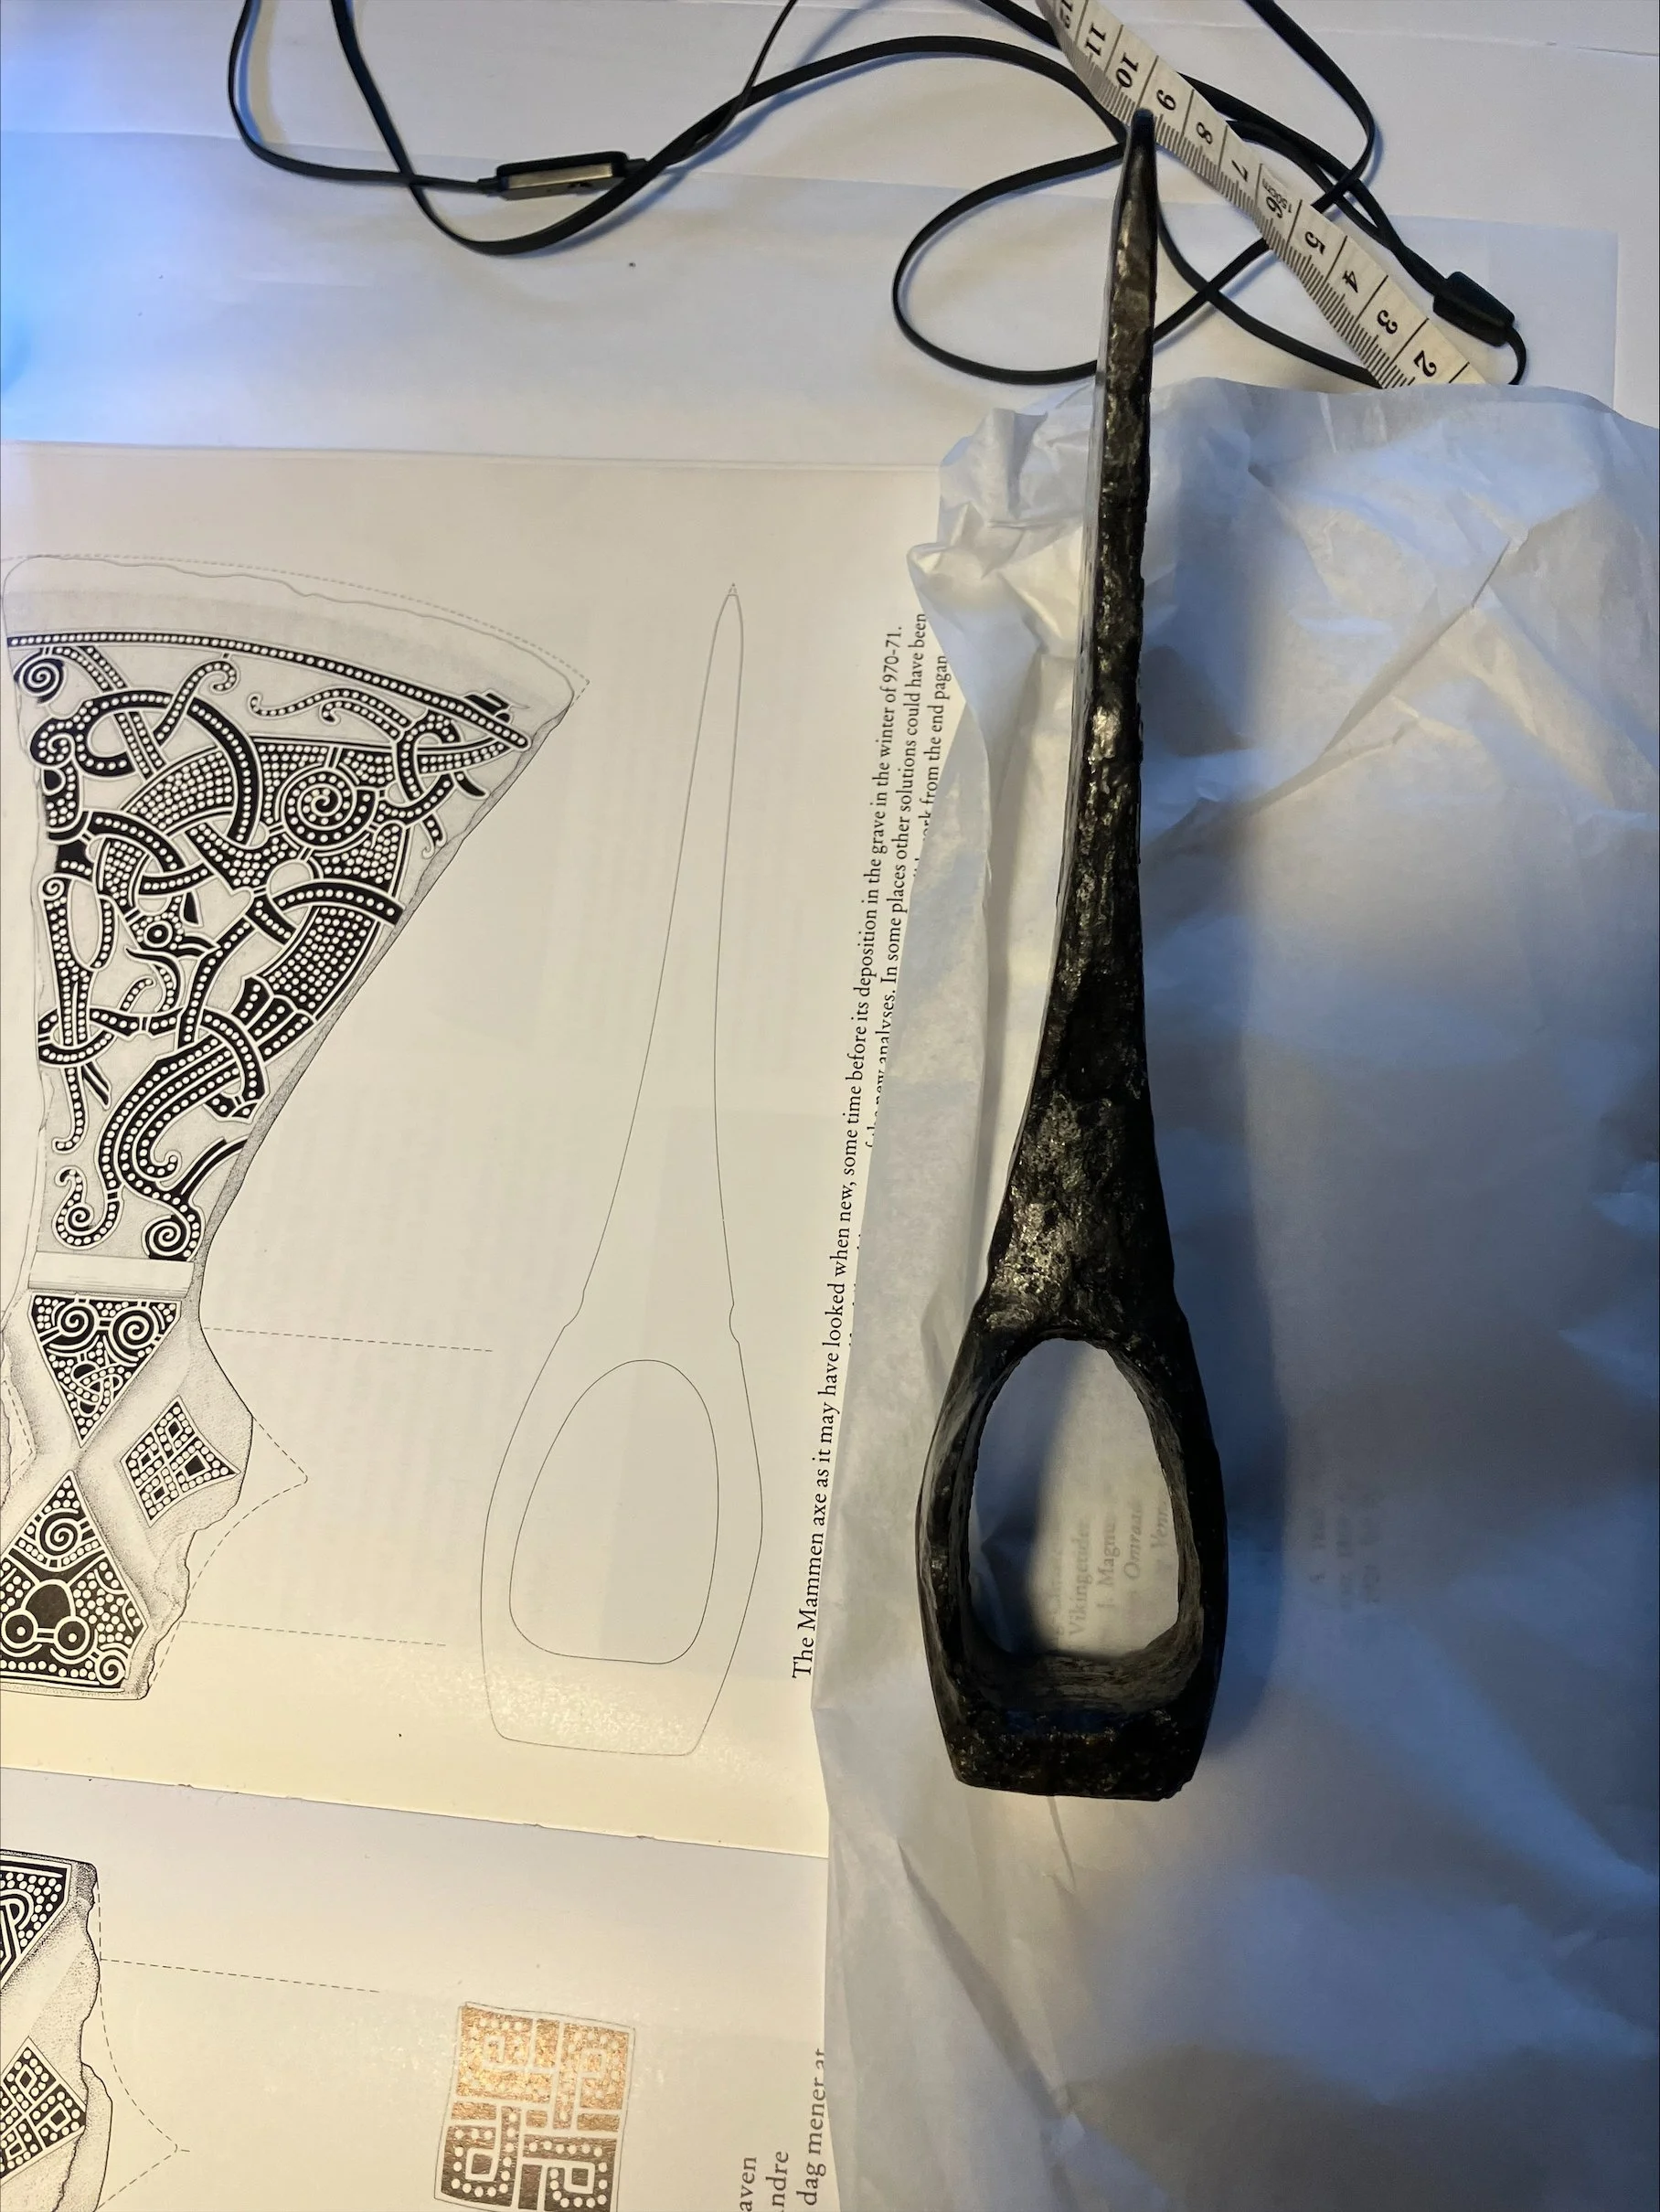

Making of the Mammen axe
The most time intensive aspect of making an object like this is the various inlaying. I have somewhat documented the process and its phases below.
While the inlaying technique itself is not shown, I inlay the silver wire using various carving bits and a pneumatic graver. The technique works on the same principle as early medieval inlaying, the only difference being the speed of a pneumatic tool versus hammer and chisel.

After forging the axe head from wrought iron and historical steel, as well as reconstructing the original ornament using various sources, my understanding of viking age art and some help from colleagues, I can begin.
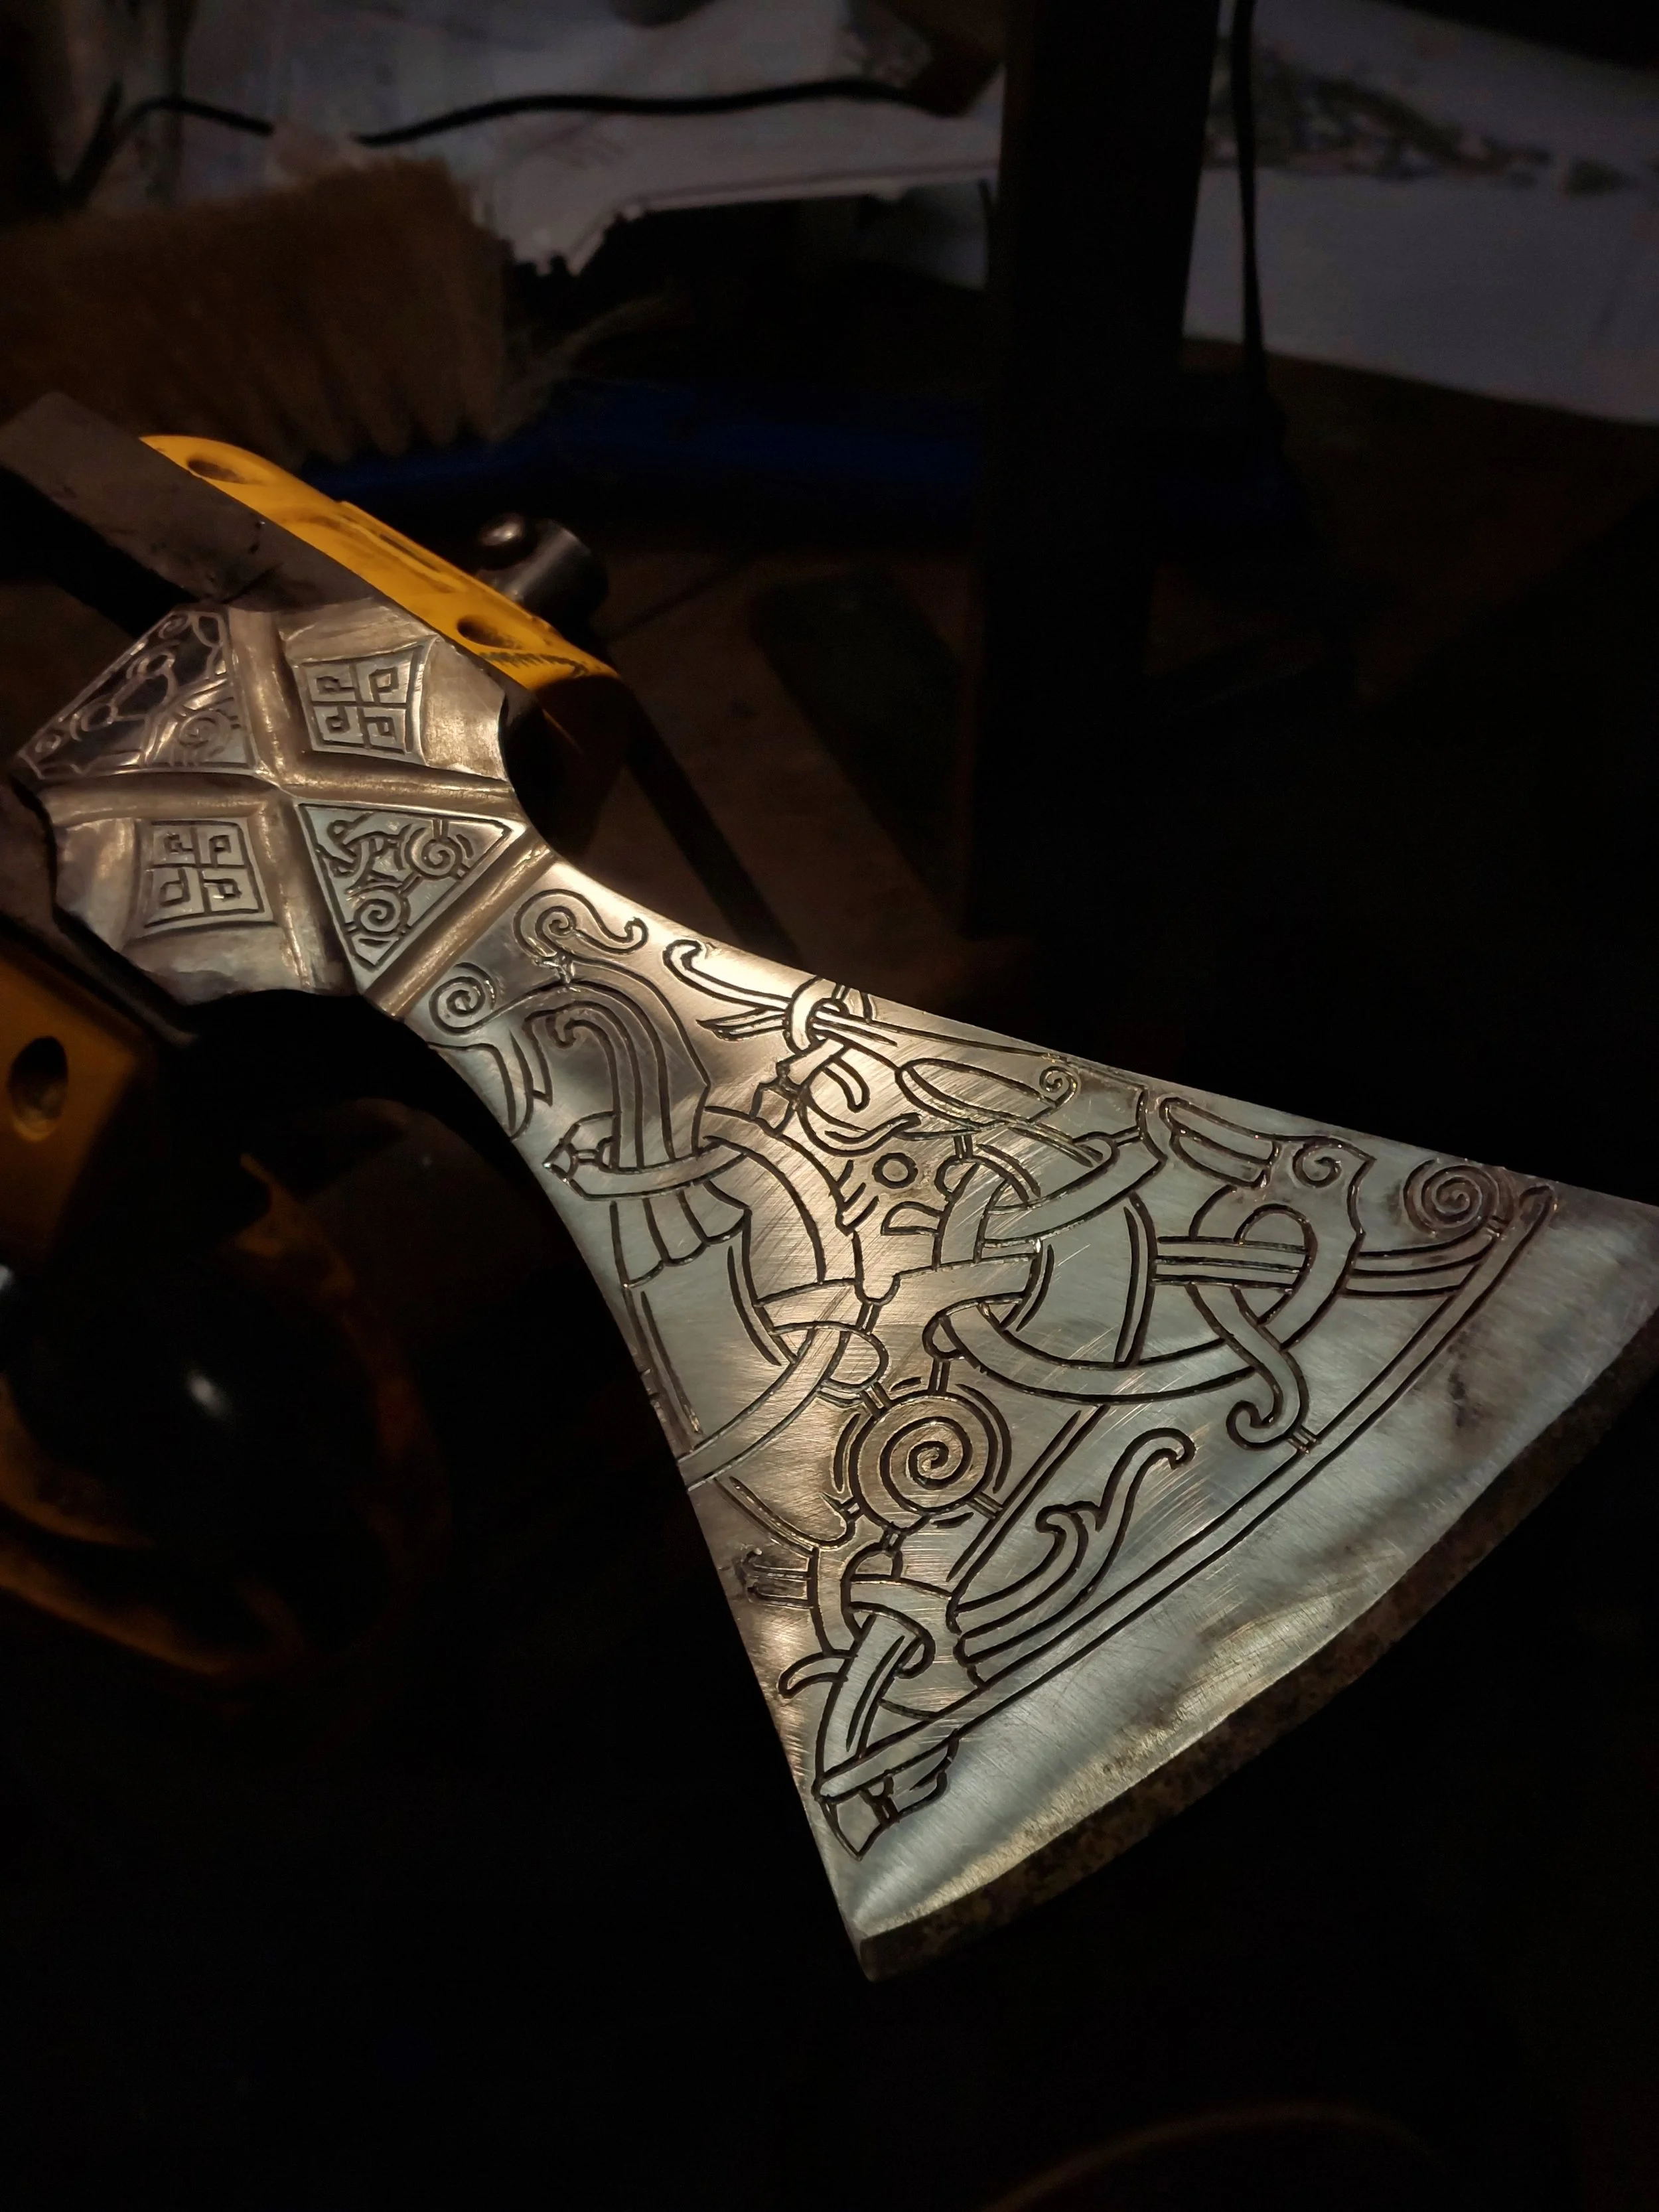

Firstly, the outlines are traced onto the workpiece and cut using a chisel.

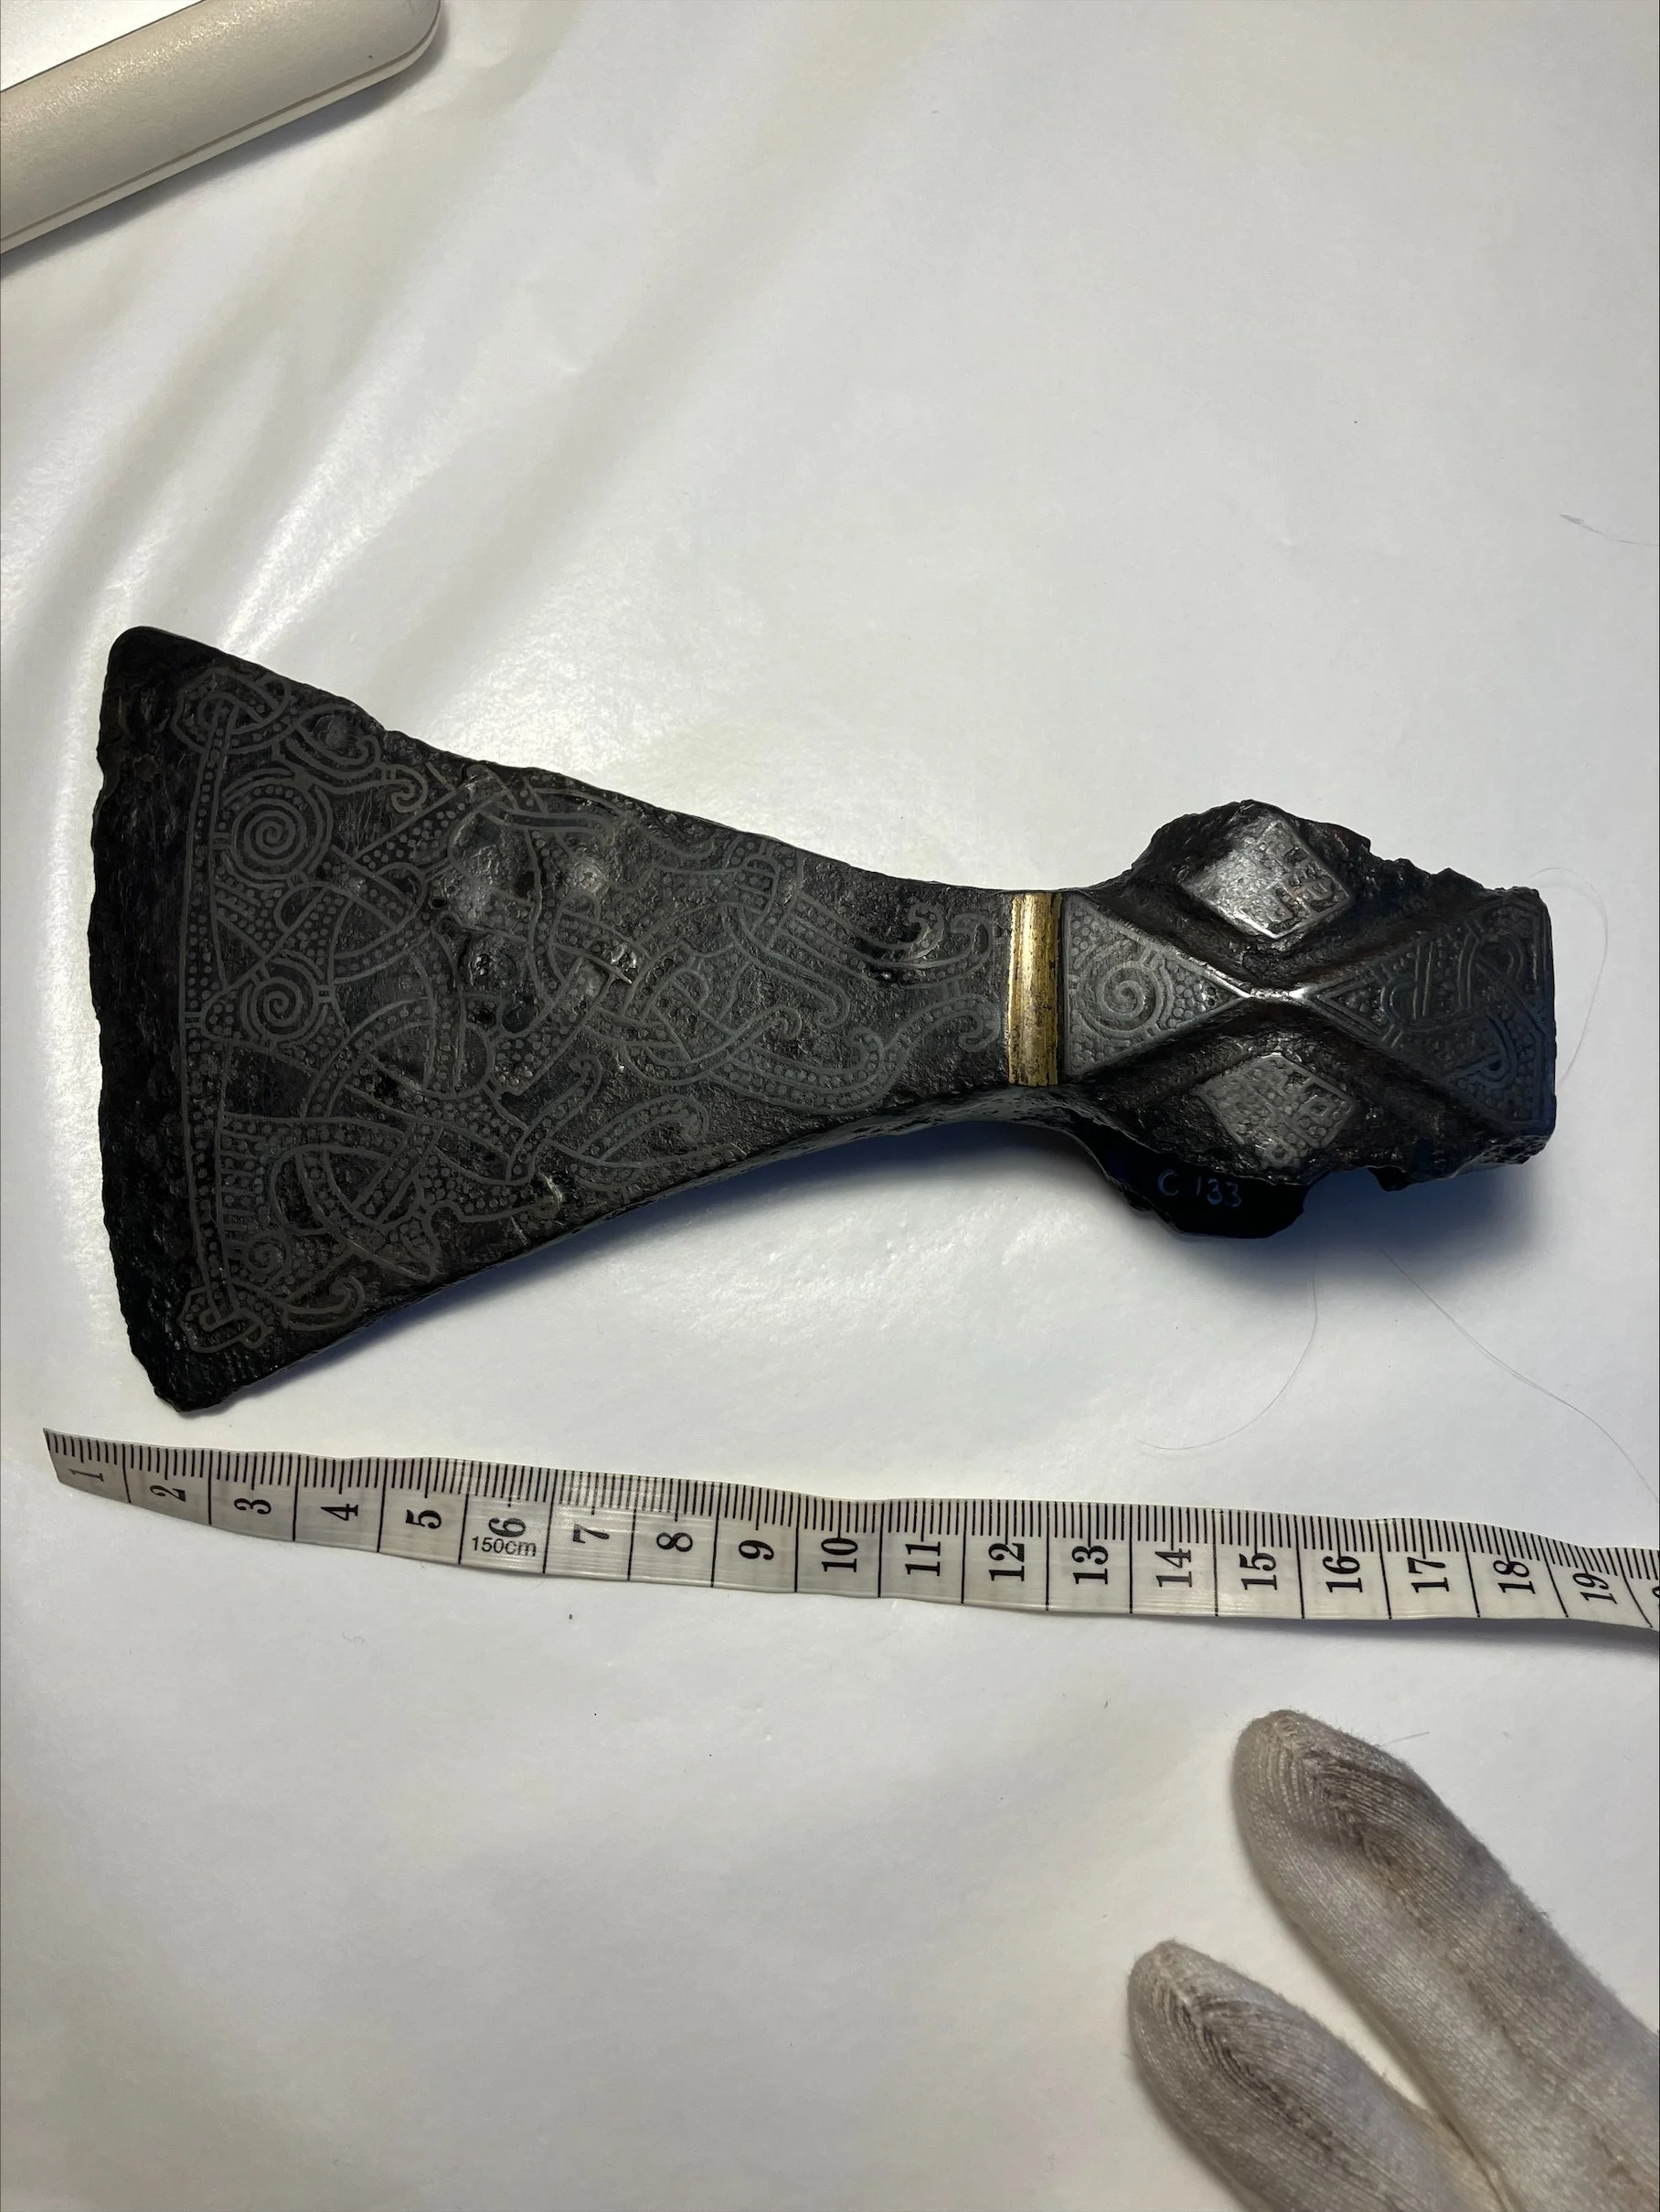
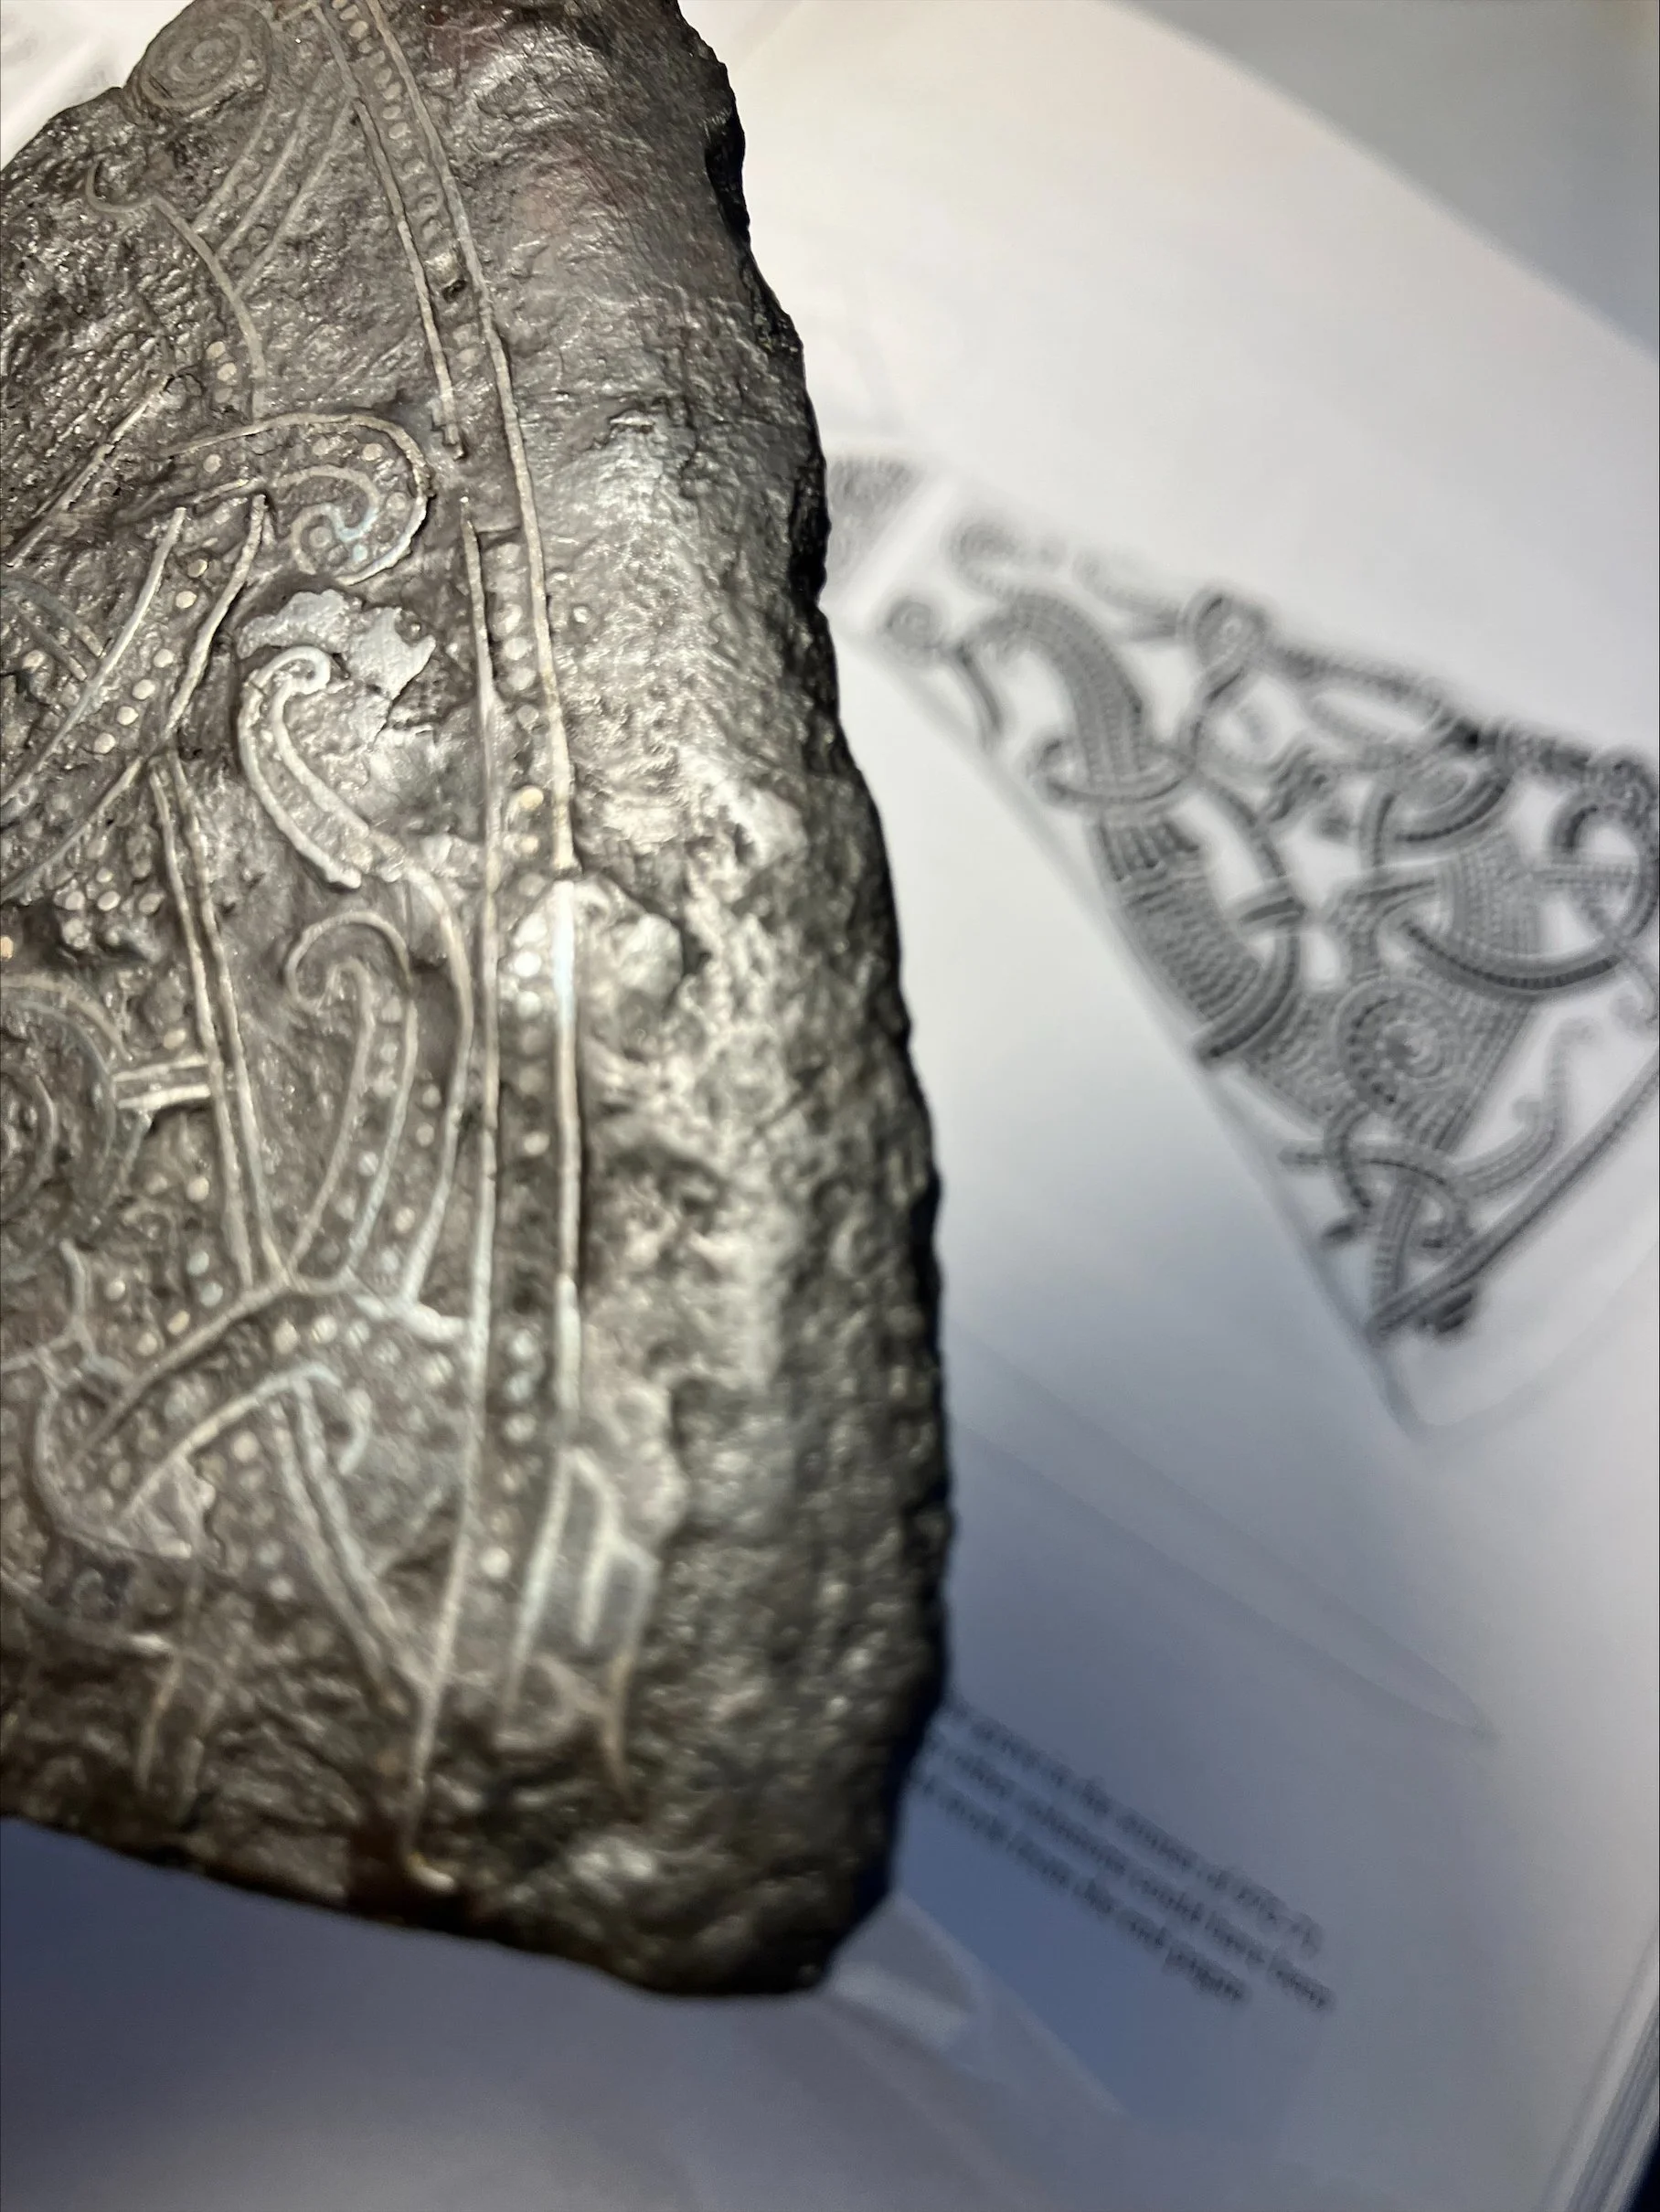
As the silver sits in the main ornament, the axe is yet again ground clean to expose the clean artwork.
After cutting the lines, they need to be adjusted to prevent the wire from falling out. In this instance, I undercut the lines to create a line with a bottom wider than top.

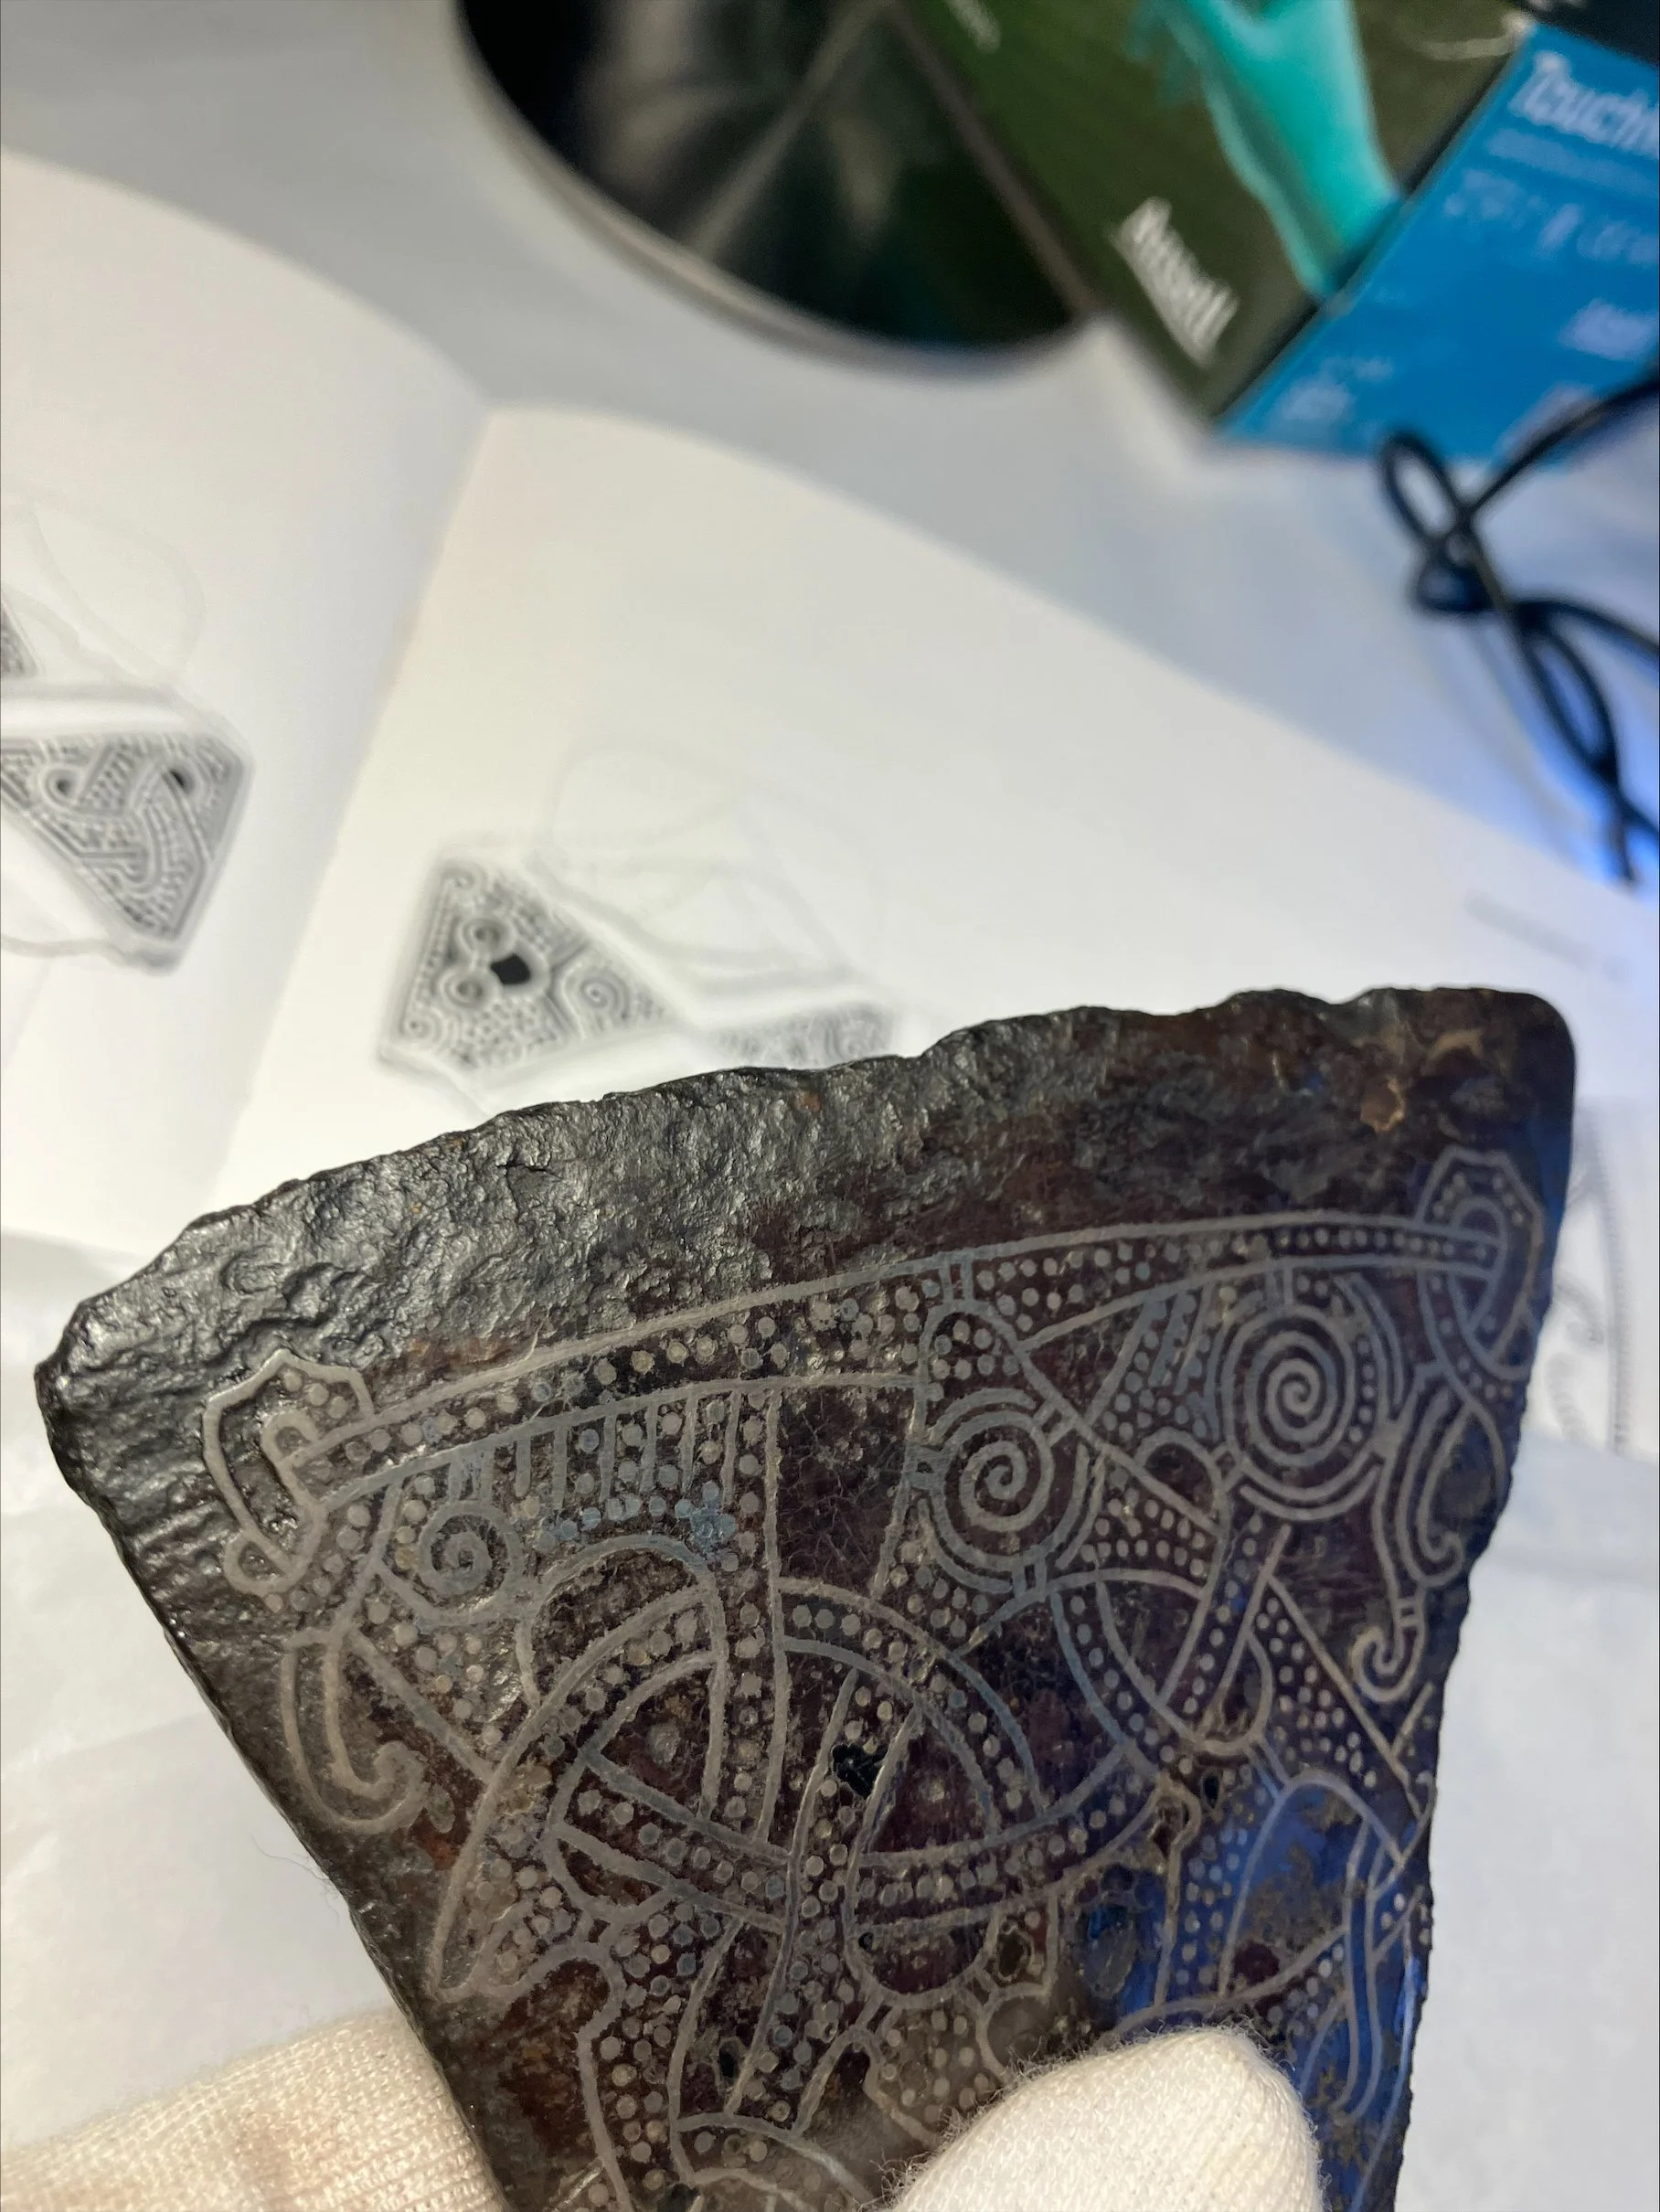
Only after inlaying the main ornament can I begin inlaying the many hundred silver dots in this design.

Lastly, the brass collar is hammered in place, formed by multiple brass wires. Much like the original.

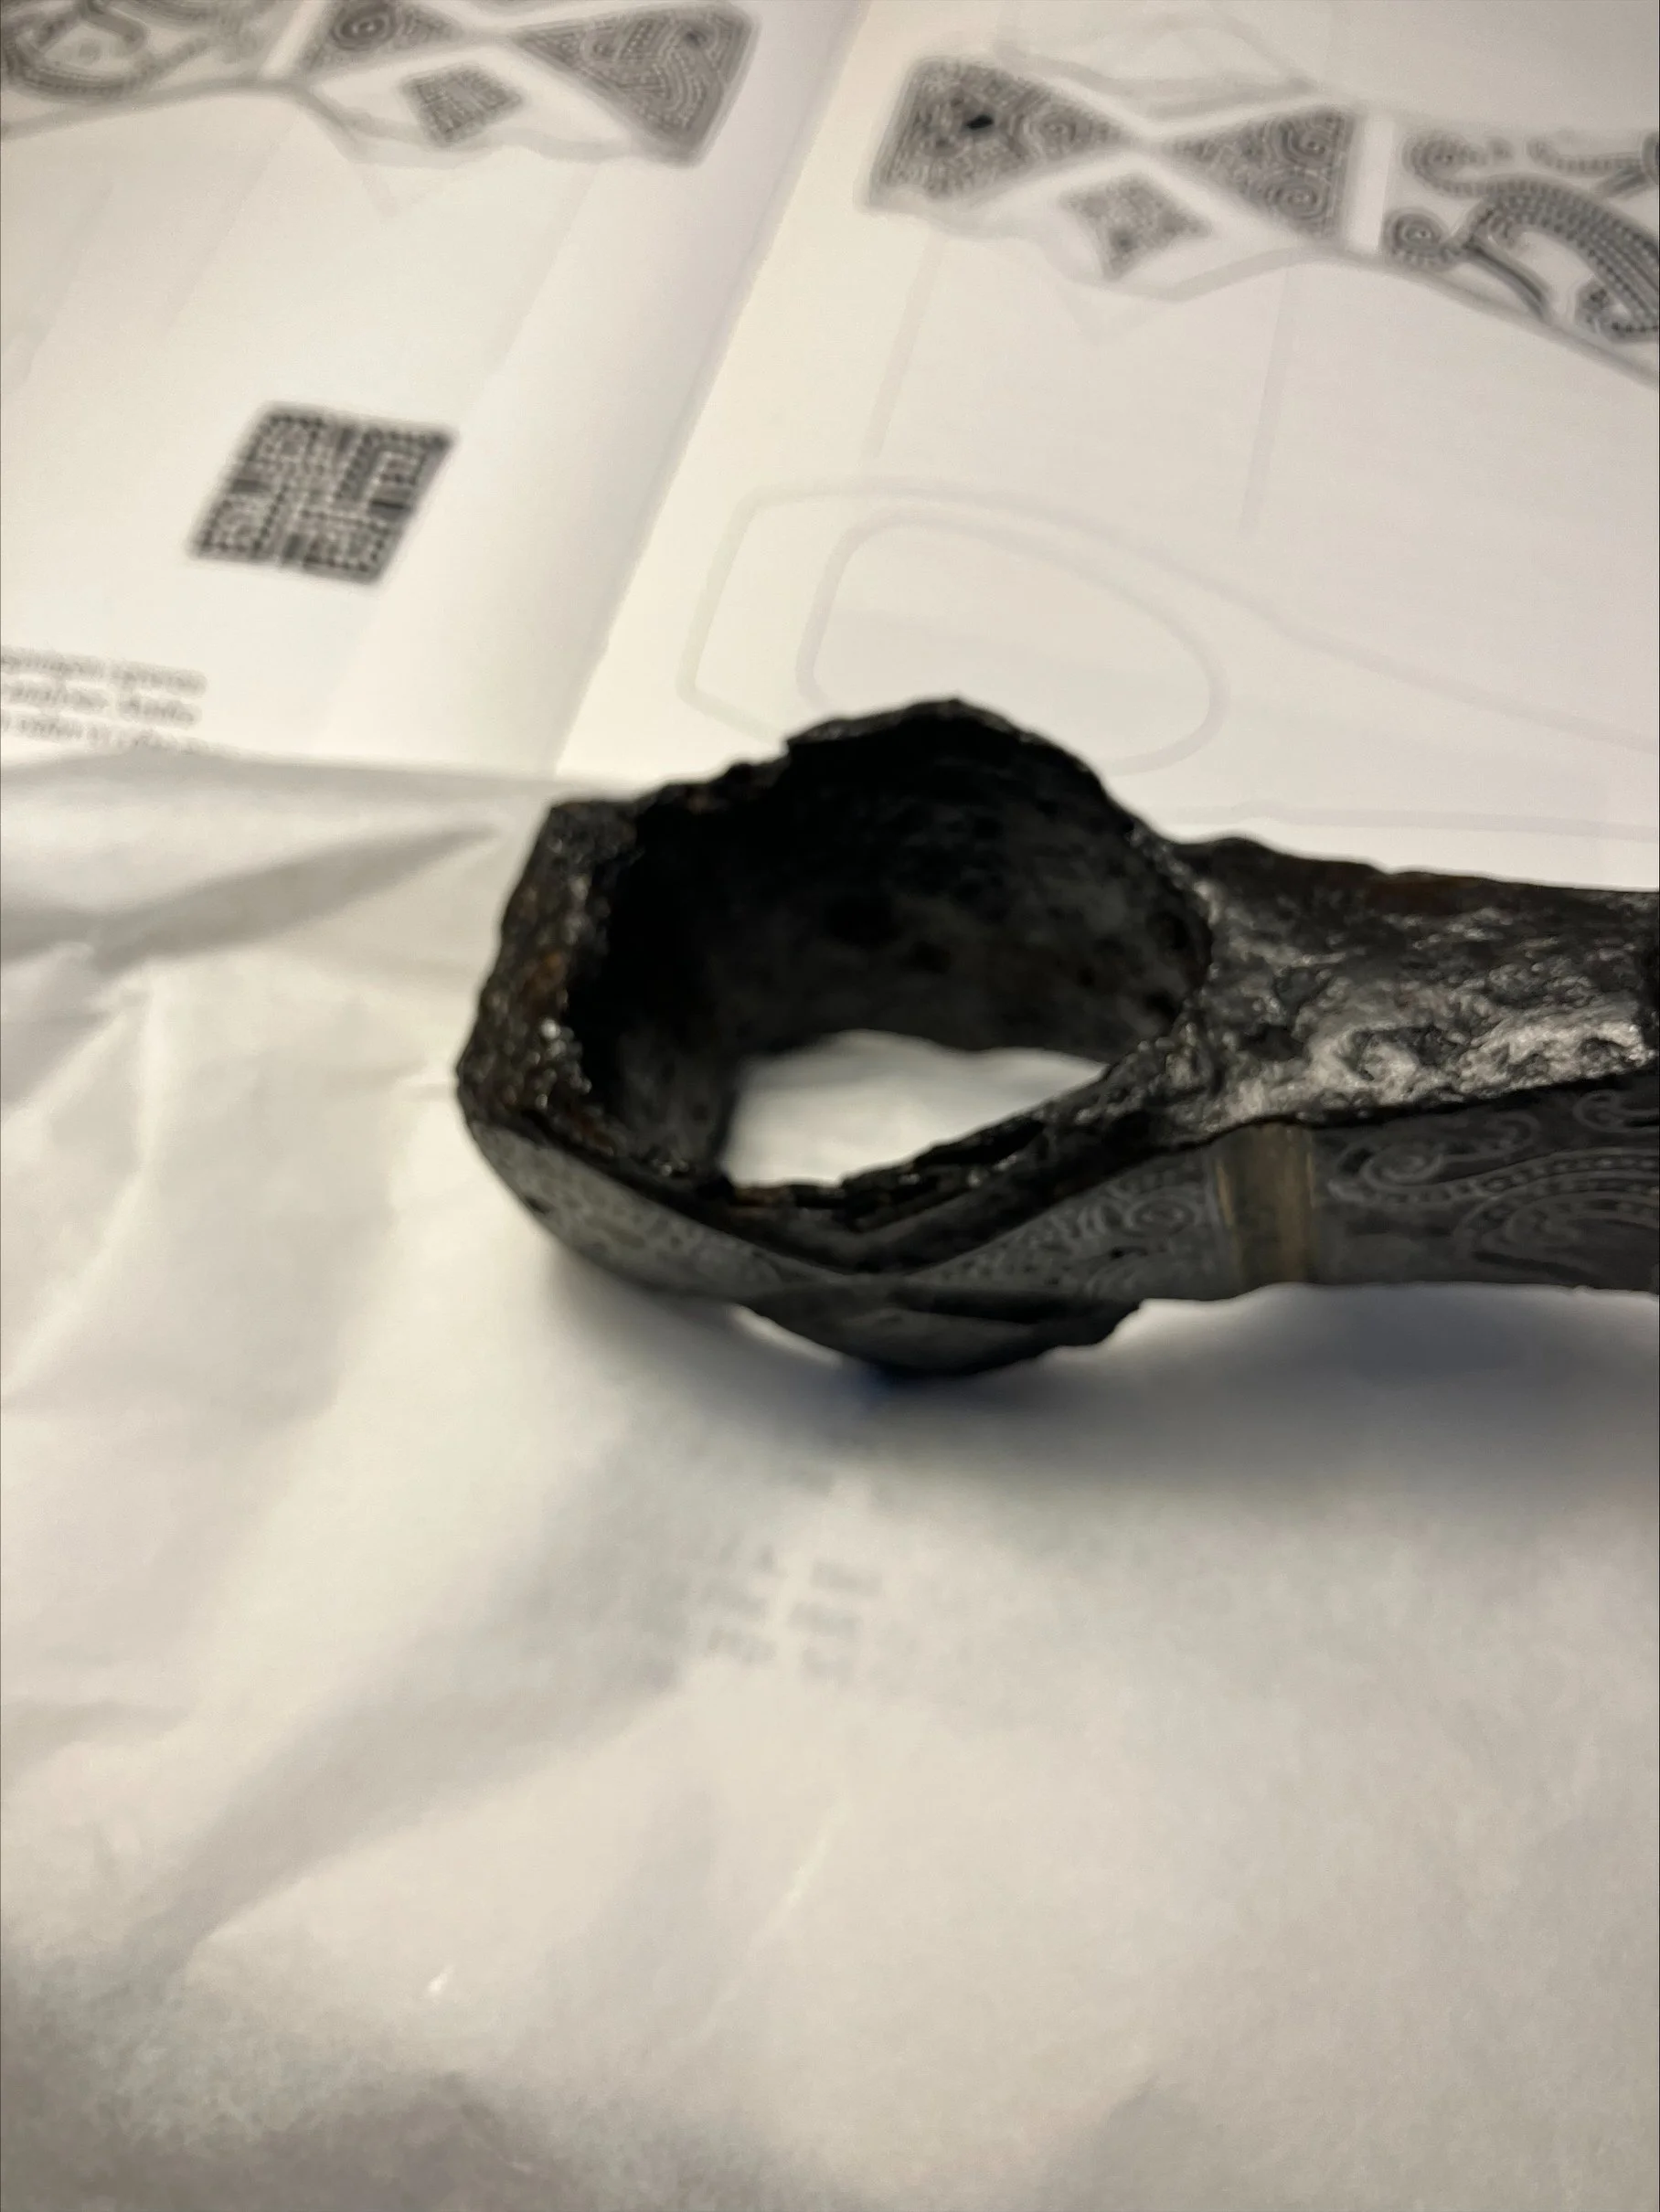
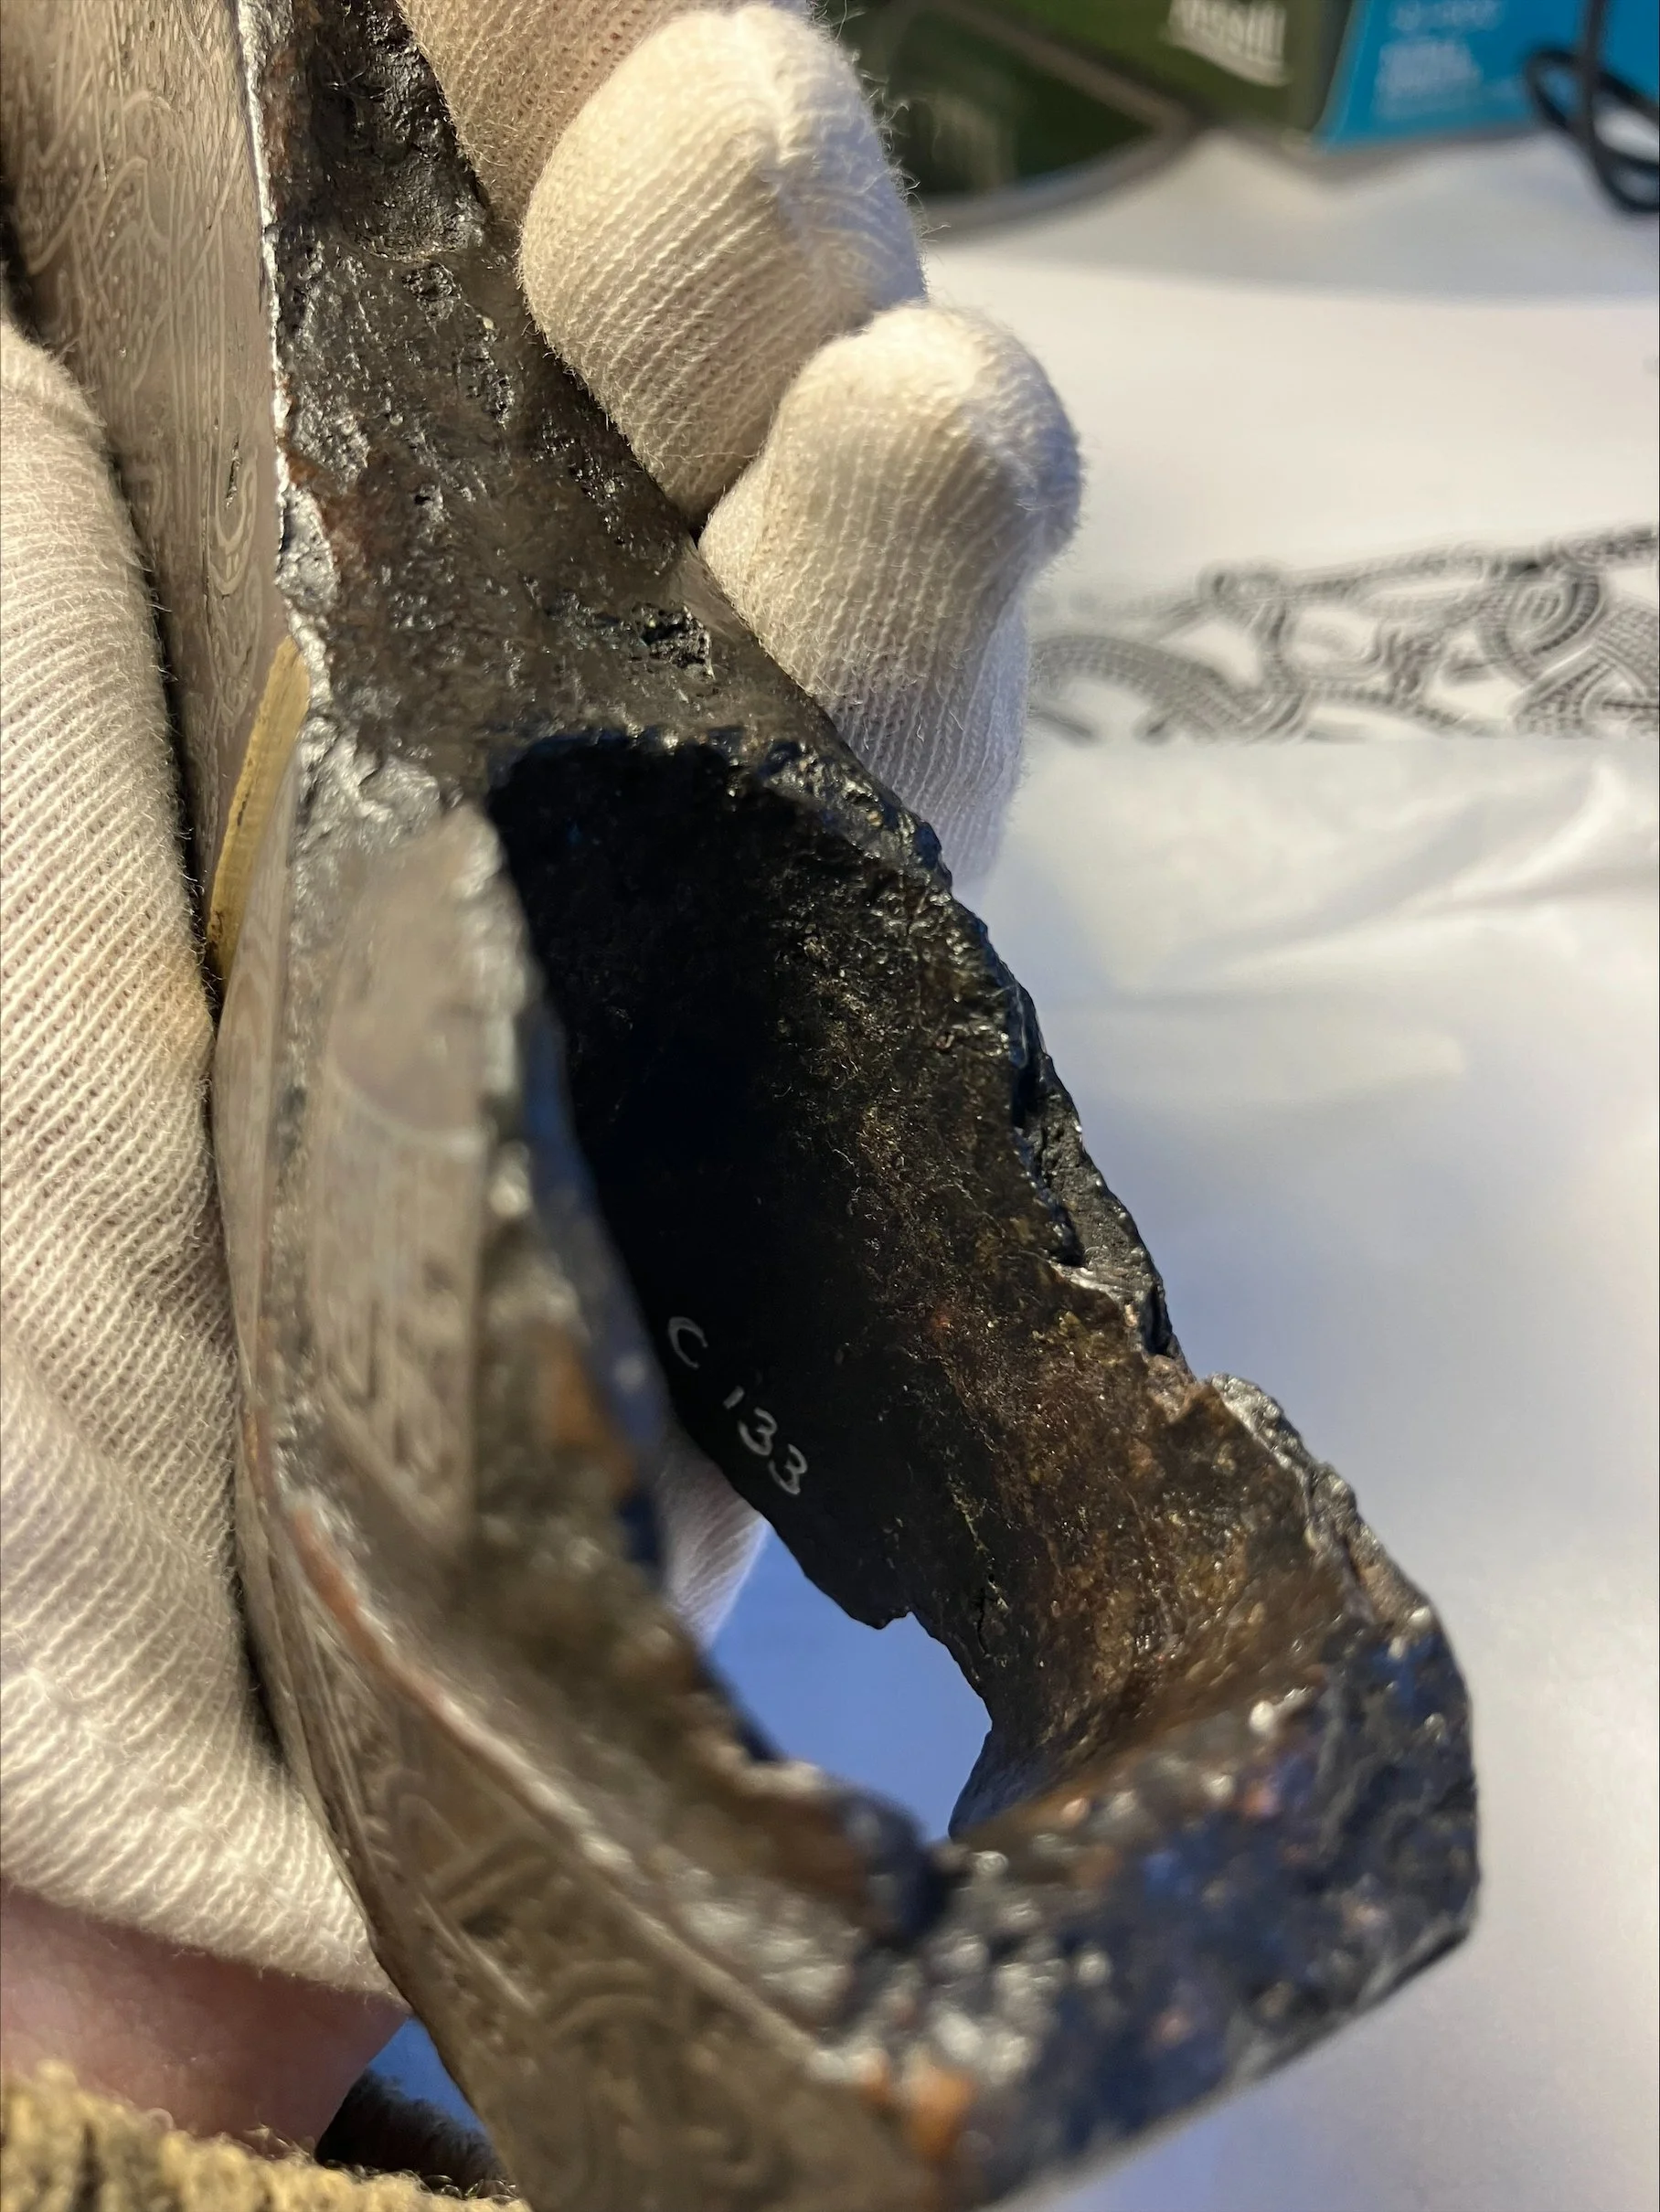
Original Photos
Original photos of the artifact taken by Gustav Hejlesen Solberg, Nationalmuseet. Many thanks.